Some eBay sellers are selling a DIY kit with a pre-assembled PCB with the MAX7219 and an 8X8 LED matrix.
They look like: (note the FC-16 on the PCB)

For these kits to work, the 8x8 LED matrix must be row cathode column anode commonly referred to as "common cathode".
In addition, the 8x8 LED matrix must be inserted upside-down.
Looking down at the PCB with the FC-16 lettering at the top, the connections with the 8x8 LED matrix inserted upside down are as follows:
matrix 8 7 6 5 4 3 2 1
MAX7219 6 10 23 8 16 14 5 3
MAX7219 2 20 21 7 22 11 15 17
matrix 9 10 11 12 13 14 15 16
Because we have inserted the 8x8 LED matrix upside down, row0 is now the bottom row, and column0 is the rightmost column. If using LedControl library for the Arduino, your code must be adjusted accordingly.
Some eBay sellers are sending "common anode" 8x8 LED matrices. Those will absolutely not work.
If you bought the row anode column cathode 8x8 LED matrix instead of the row cathode column anode 8x8 LED matrix, you can still use the LedControl library.
we need row cathode 8x8 LED matrix:
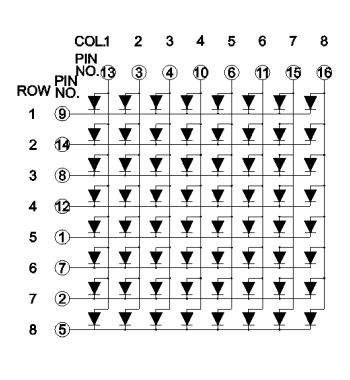
we have row anode 8x8 LED matrix:

First, rotate the row anode 8x8 LED matrix by 90 degrees counter-clockwise, so that
its pins are now on the left and right instead of top and bottom when you look at the
front of the display. You can tell from the diagram of the rotated display that what were rows
are now columns and what were columns are now rows.

Second, wire the pins to the MAX7219 as follows:
MAX7219 pin 22 <-----> matrix pin 9
MAX7219 pin 14 <-----> matrix pin 14
MAX7219 pin 16 <-----> matrix pin 8
MAX7219 pin 20 <-----> matrix pin 12
MAX7219 pin 23 <-----> matrix pin 1
MAX7219 pin 21 <-----> matrix pin 7
MAX7219 pin 15 <-----> matrix pin 2
MAX7219 pin 17 <-----> matrix pin 5
MAX7219 pin 2 <-----> matrix pin 16
MAX7219 pin 11 <-----> matrix pin 15
MAX7219 pin 6 <-----> matrix pin 11
MAX7219 pin 7 <-----> matrix pin 6
MAX7219 pin 3 <-----> matrix pin 10
MAX7219 pin 10 <-----> matrix pin 4
MAX7219 pin 5 <-----> matrix pin 3
MAX7219 pin 8 <-----> matrix pin 13
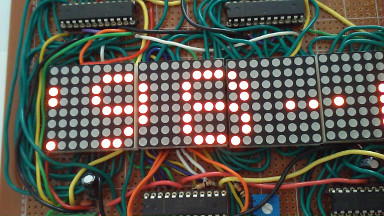
This project has four 8x8 column-anode LED matrices. The scrolling message is controlled by an Arduino Uno R3. Click on the photo to view the video of the display in action.
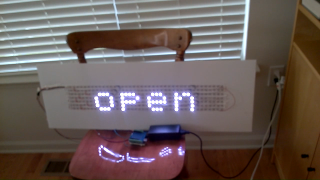
This is a sign made from a 5-meter long WS2812B RGB LED strip purchased on eBay. There are 60 LEDs per 1 meter. The strip was cut into seven (7) strips of 40 LEDs each. The sign is controlled by an Arduino Uno R3. As constructed, six characters can be displayed. Click on the photo to see a video of the sign in action.
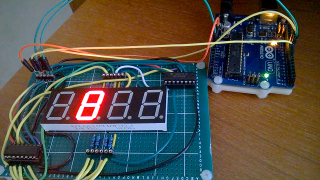
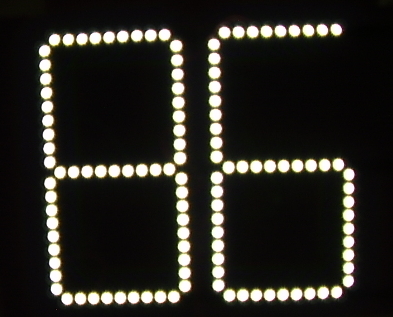
This a 7-segment LED display with 4 digits (Sparkfun.com COM-11405). It is powered by an Arduino Uno R3. The multiplexing of signals to control the display is handled by two 74HC595, a 8-bit shift register. One of the 74HC595 controls the 7 segments. The decimal point is not used. The other 74HC595 controls which digit in the display is turned on/off. This display is common-cathode. Click on the photo to see a video of the display in action.
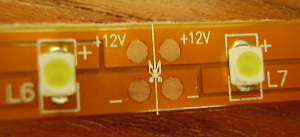
The LED spool has 3M double-sided tape on one side. There are 60 LEDs per meter.
You can cut the spool after every 3 LED. The photo below shows where you can cut the strip.
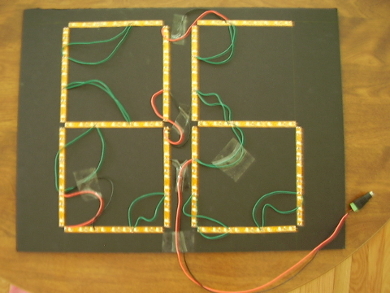
My strips have 9 LEDs and are slightly less than 6 inches in length. Each number in the sign is about 12.75 inches in height.
I connected the power for the LED strip such that the +12V are connected sequentially. Strip1's +12V is connected to strip2's +12V which is connected to strip3's +12V and so forth. This sign has thirteen (13) strips. It does not matter which is strip #1 as long as each strip gets 12V. Similarly the grounds for each strip must be connected serially.
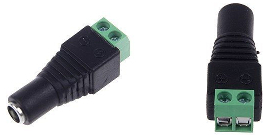
The 5.5mm x 2.5mm DC barrel jack adapter female makes it easier to connect the LED strip's +12V and ground to the AC adapter.
The red and black (+12VDC and ground) wires from the sign go into one end and the other end mates with the plug of the AC adapter.
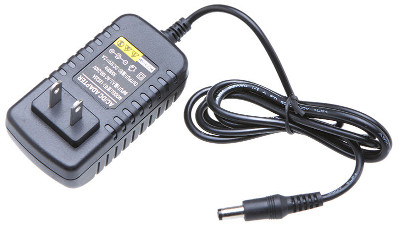
I bought AC adapters from two different sellers on eBay. One AC adapter has a tip that is 5.5mm x 2.5mm. The other AC adapter has a tip that is 5.5mm x 2.1mm.
